Tunnels using Pangolin
It’s all about the Tunnels, baby!
This is the fifth installment of a series of posts about taking back control of my web presence. Part 1 is about hosting, Part 2 talks about DNS, in Part 3 I rediscover Proxmox and in Part 4 I move Mastodon around.
One of the additional services I use of Cloudflare (besides DNS) is Cloudflare Tunnels, part of their Zero Trust offering. Very practical, but also very much locks you into using their DNS. I use this for a couple of services amonst which is Home Assistant as detailed on this blog post.
Pangolin
I came across Pangolin via someone on Mastodon (I don’t remember who):
Tunneled Mesh Reverse Proxy Server with Access Control
Your own self-hosted zero trust tunnel.
Pangolin is a self-hosted tunneled reverse proxy server with identity and access control, designed to securely expose private resources on distributed networks. Acting as a central hub, it connects isolated networks — even those behind restrictive firewalls — through encrypted tunnels, enabling easy access to remote services without opening ports.
It offers:
- reverse proxy functionalities through wireguard tunnels
- site-to-site connectivity via a wireguard client Newt
- dentity and access management with SSO,
- support for both HTTP(S) and raw TCP/UDP
- Load balancing
While this offers a subset of the features of Cloudflare Tunnels, it does not offer functionality for mTLS. This needed to be tackled through different means.
Configuration
Deploying it was well documented - I went with the manual install as I prefered to have more control over it.
The config file options are also well documented.
After deploying it, I added a reverse proxy definition in my caddy Configuration and everything started to work :)
Tunneling
Adding a tunnel was straightforward:
-
Add a site, selecting your tunnel type (eg. Newt), and write down the
endpoint,Newt IDandNewt Secret Key.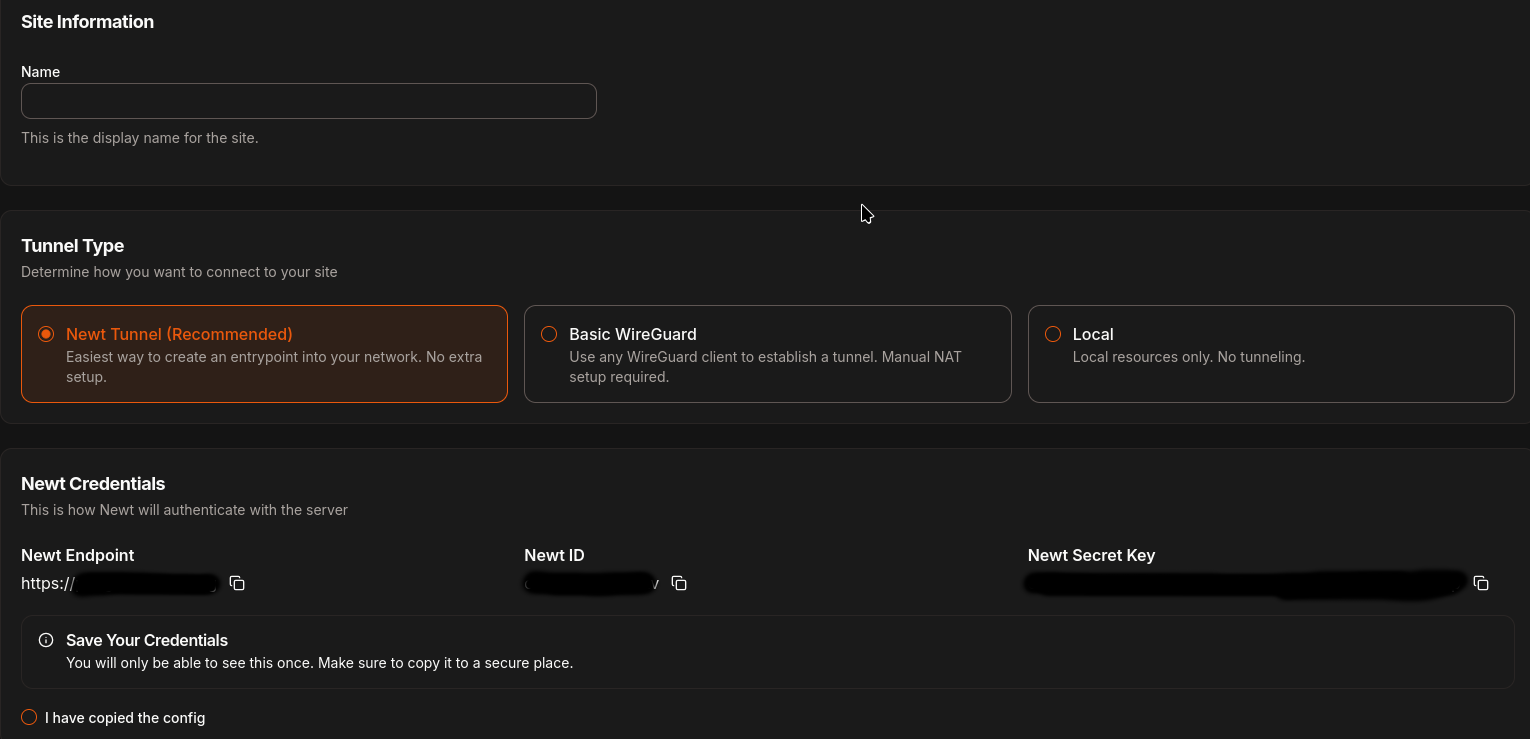
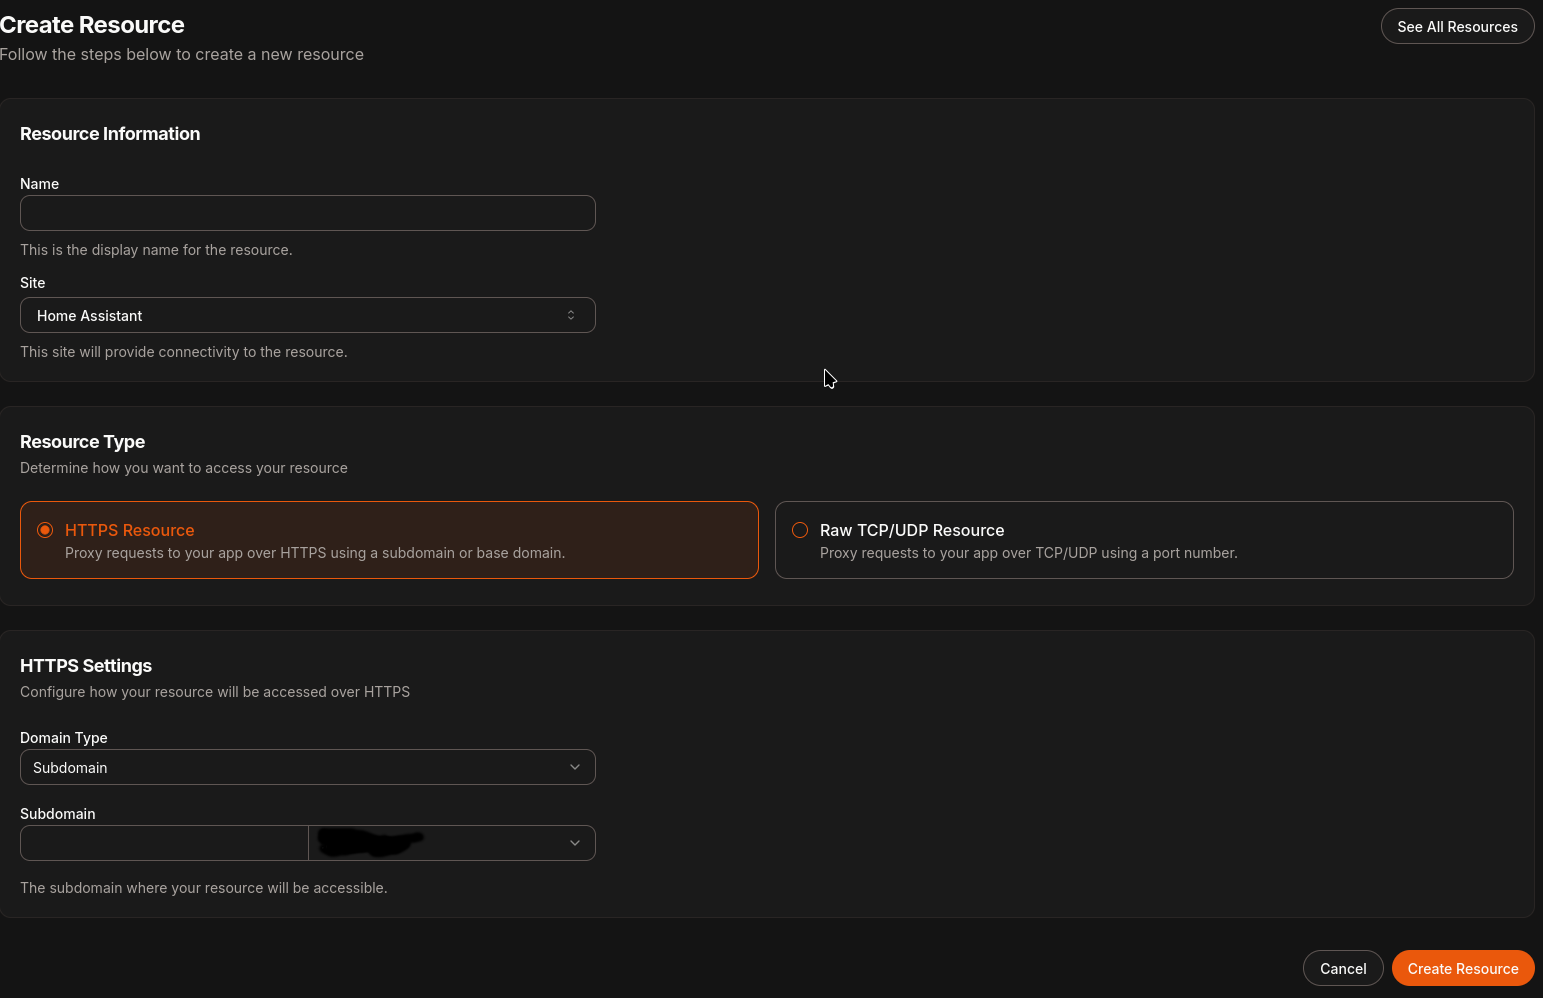
-
Select ‘Resources’, choose the site you added in step 1, pick HTTPS resource, and add the subdomain you want it to be available on.
-
Edit the resource you just added, and configure what needs to happen - in this case, traffic is sent to
localhoston port 80. Localhost is where the Newt wireguard client is running.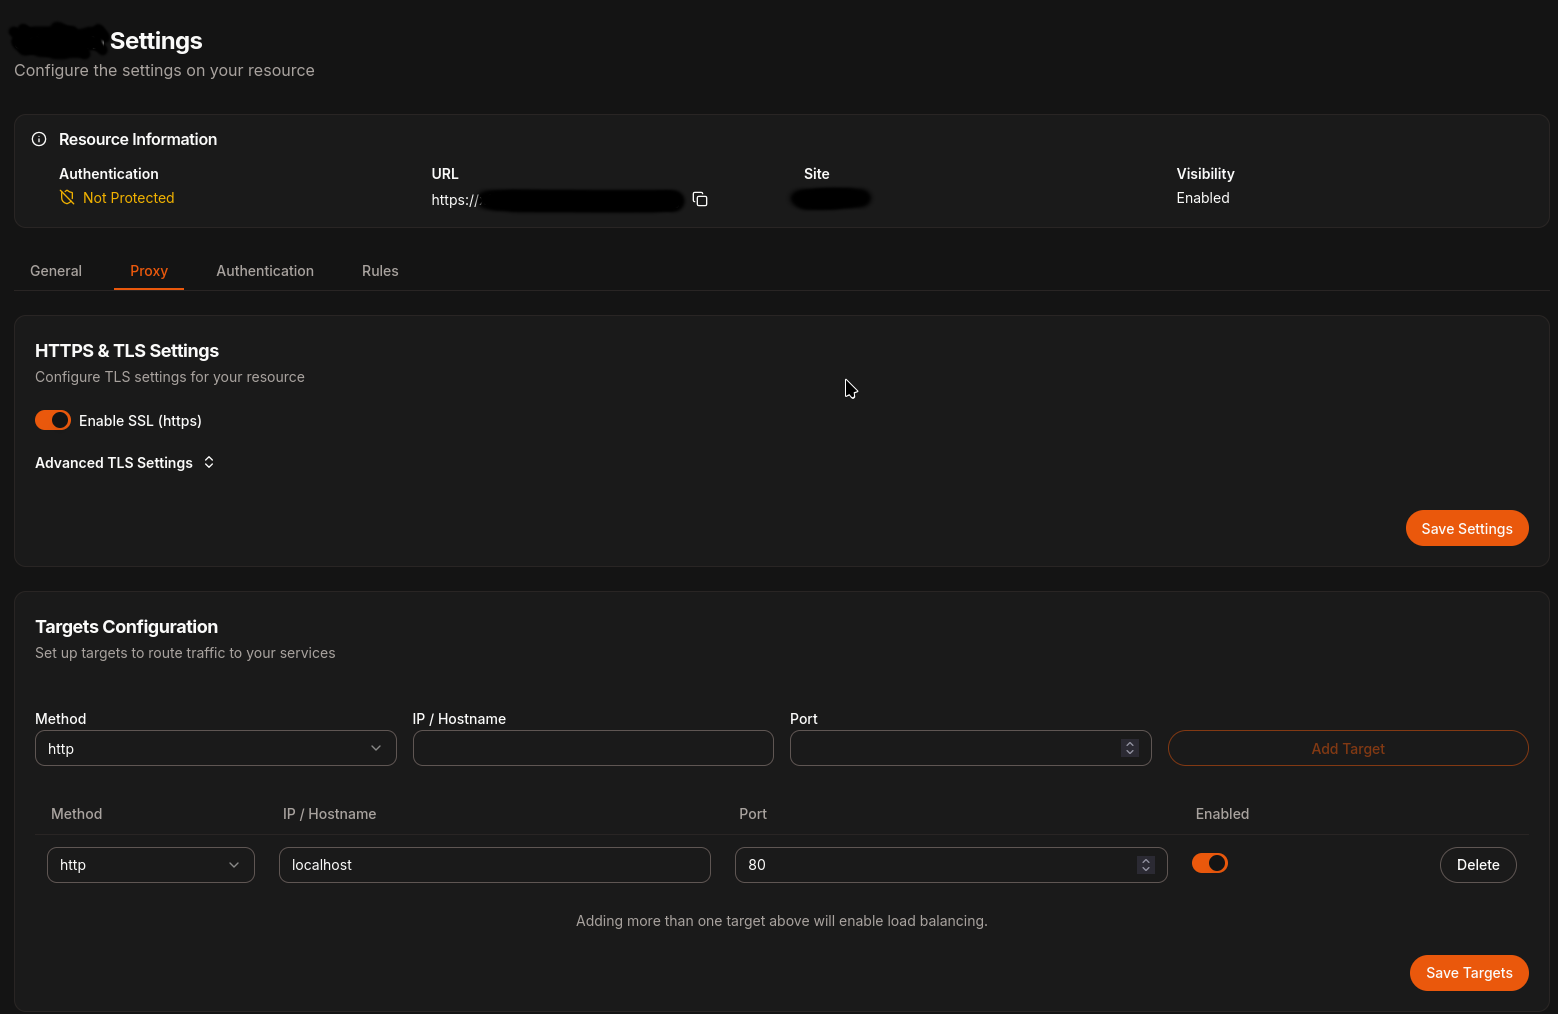
-
Deploy Newt on your target, and see it connect :)
mTLS with VaulTLS
On the Selfh.st weekly newsletter I came across a new project called VaulTLS:
a modern solution for managing mTLS (mutual TLS) certificates with ease. It provides a centralized platform for generating, managing, and distributing client TLS certificates for your home lab.”.
Before I get comments - yes, I know how it works, I know how to do it with the CLI, but having a GUI is … nice. And easier for non-technically inclined people to work with.
I deployed VaulTLS, configured a user and created some certificates, downloaded them and installed them on my mobile devices.
The configuration in caddy needed some adjusting:
myhost.myfqdn {
  tls {
    client_auth {
      mode verify_if_given
      trust_pool http {
        endpoints http://vaultls-host:5173/api/certificates/ca/download
      }
    }
  }

  @noCert vars {tls_client_subject} ""
  error @noCert "Client certificate required" 403

  reverse_proxy https://pangolin-host {
    transport http {
      tls_insecure_skip_verify
    }
    header_up Host {host}
  }
}
At this point, caddy requests a certificate from the client, and only grants access if it can validate it.
Leave a comment