Using Cloudflare ZeroTrust and mTLS to securely access Home Assistant via the internet
I’m a big fan of Home Assistant, and until now I only had it accessible from inside my own network. Outside access was only possible through a WireGuard VPN. This works, but isn’t very practical - definitely when I quickly want to check something, or need to diagnose something while on the road, having to toggle the VPN & hope that the DNS resolution works (which sometimes it doesn’t) - the extra hoops make it annoying. Add to that that the location features of Home Assistant aren’t useful until the location of the device is updated in Home Assistant…
A thread on a forum I frequent about WAN connectivity to Home Assistant made me wonder if there weren’t better ways to get it to work.
One thing I definitely didn’t want to do was just put it out on the internet, port forwarding from my router. That’s just begging to be hacked that way:
- Anyone can “knock on the door” (load the interface).
- The interface might not be as hardened against attacks.
- Bugs happen. In everything.
- Unless you have a static IP, any IP change will cause issues (fixable with Dynamic DNS).
So I definitely wanted to put a reverse proxy in front of it and preferrably also only make it accessible from my own mobile devices (Android based, I don’t own any Apple smartphones/tablets).
One thing that exists is Home Assistant Cloud, offered by Nabu Casa - the company behind Home Assistant - through which you also support the Home Assistant project.
This does not tick the box of ‘only accessible by my devices’, so I went looking further.
Cloudflare has entered the building
I already use a Cloudflare Tunnel for another project, so I figured this might be a good candidate.
Setting up cloudflared on Home Assistant
Luckely there’s an add-on for cloudflared for Home Assistant by Tobias Brenner, which makes it a case of point-and-click to get this up and running:
- Add the repository to Home Assistant.
- Install the Cloudflared add-on.
- Set a hostname in the configuration.

- Start the add-on.
- Check the log of the add-on. It’ll ask you to open a URL to authenticate with Cloudflare and then proceed to create the tunnel for you.
The documentation is on GitHub.
✨ Magic! 🪄
Configuring Home Assistant to accept the proxied traffic
Home Assistant by default will not allow you to connect from (reverse) proxies. To allow this, you’ll need to change your configuration.yaml file, as per the documentation.
You’ll need to add this and restart Home Assistant:
http:
  use_x_forwarded_for: true
  trusted_proxies:
    - 172.30.33.0/24
(or modify the existing http: stanza if present).
At this point Home Assistant will be available through the hostname you configured, but open to the entire internet. Time to change that!
Creating an mTLS client certificate
By installing an mTLS client certificate on your clients you’ll be able to tell Cloudflare “this is a device I own”, and Cloudflare can use that information to allow you in.
You can create an mTLS certificate by navigating in the Cloudflare dashboard to your account → your website → SSL/TLS → Client Certificates. There click on “Create Certificate”.
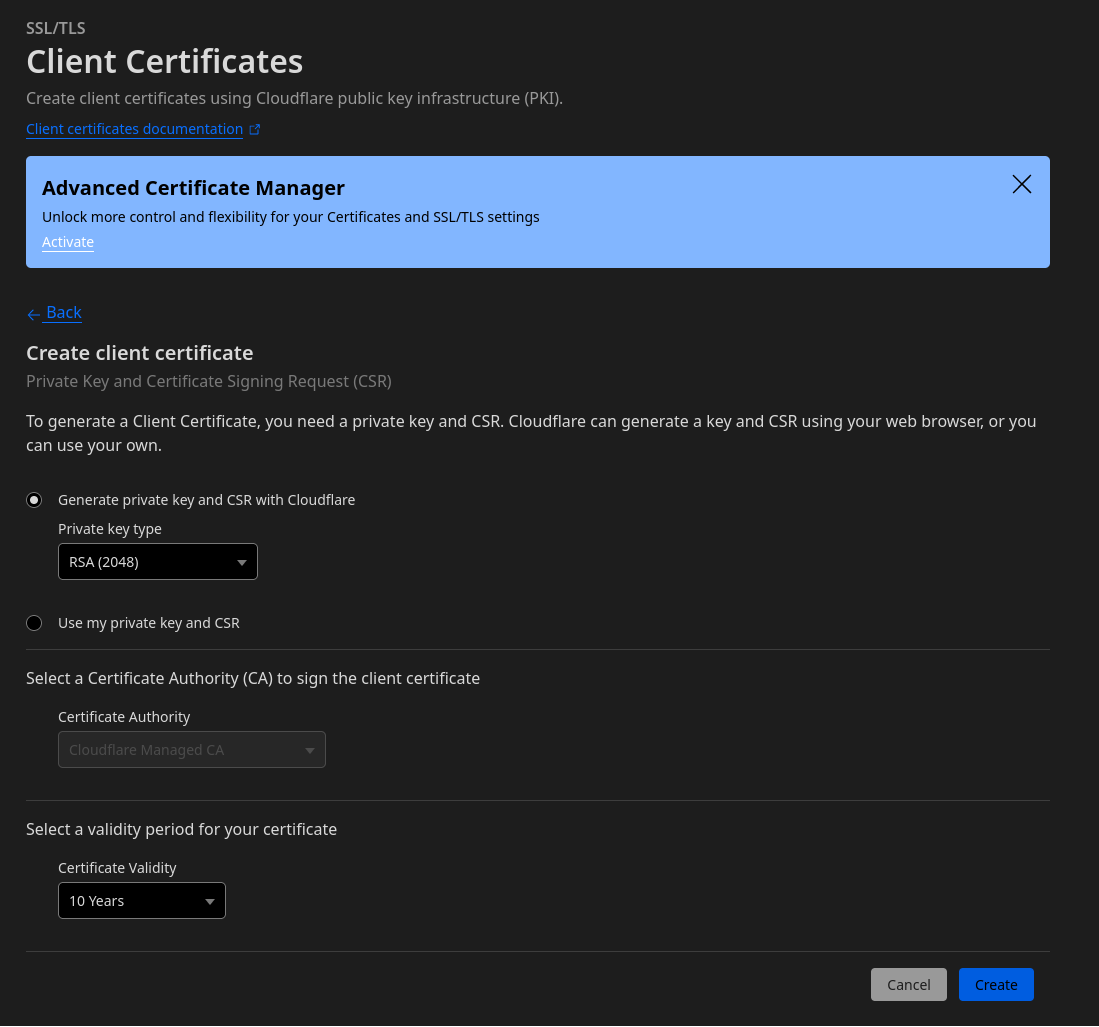
You can keep these settings as they are. Click “Create”.
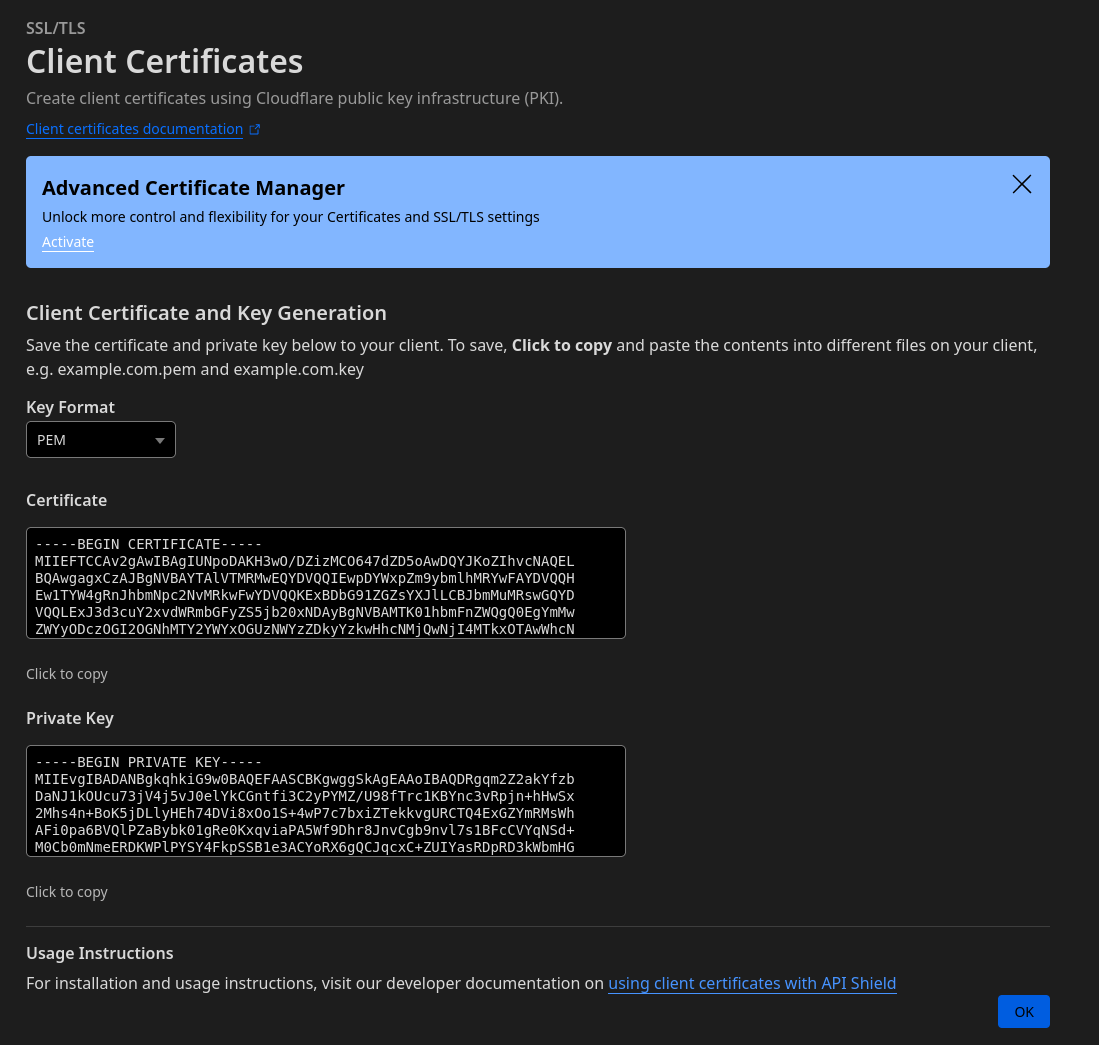
Next copy the certificate and the private key in two seperate files and store those somewhere on your filesystem. In my example, I use mtls.key.pem for the private key, and mtls.cert.pem for the certificate.
After this you’ll see the certificate in the list in the Cloudflare dashboard.
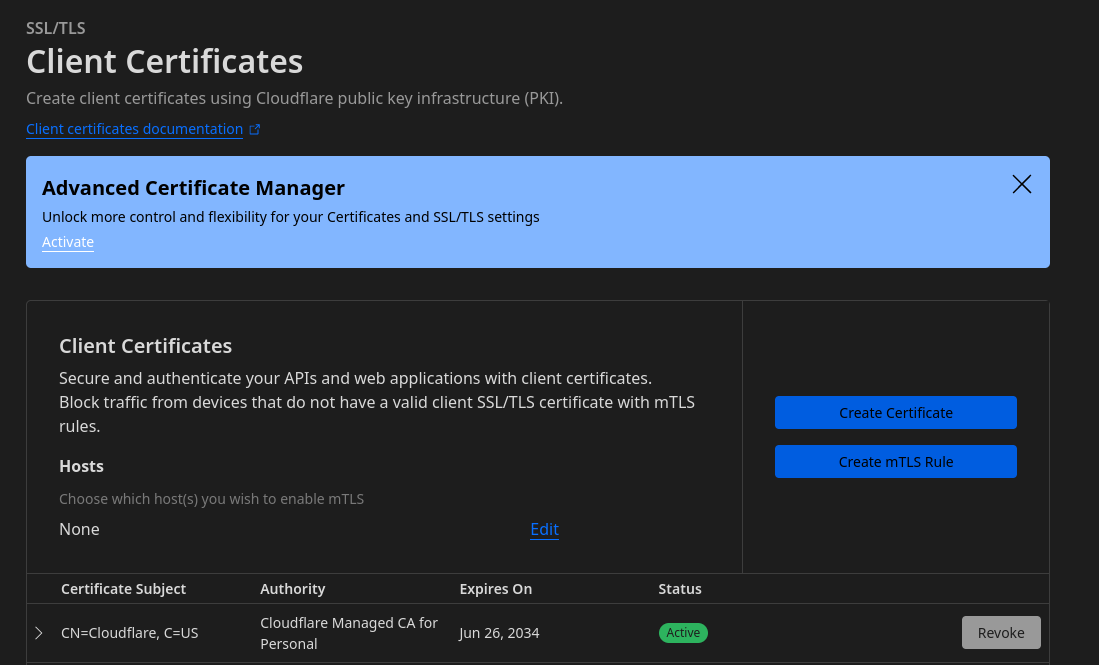
Adding the hostname of your tunnel to the mTLS configuration
Another thing you need to do (which I missed and caused me to waste a lot of time) is to add the hostname for which you want cloudflare to issue a “client certificate request” to the browser or app. This is done in the same interface, that inconspicuous “Edit” link that’s there…

Once you click “Edit” you can add the full hostname.

Click “Save” and you’re good to go.
Converting the mTLS client certificate
Your browser won’t be able to use the PEM certificates you exported earlier, because it requires both the private key and the certificate to be able to add them.
You can easily convert it using openssl:
$ openssl pkcs12 -export -out mtls_client_cert.pfx -inkey mtls.key.pem -in mtls.cert.pem
When asked for a password, specify one to your liking but don’t leave it blank (and don’t forget it, you’ll need it later).
Configuring WAF Rules
Right now anyone can connect to your hosted Home Assistant URL, regardless if they have a certificate or not. To remedy this, you need to configure some Web Application Firewall rules.
Head over to your account → your website → Security → WAF. Next choose “Custom rules”.
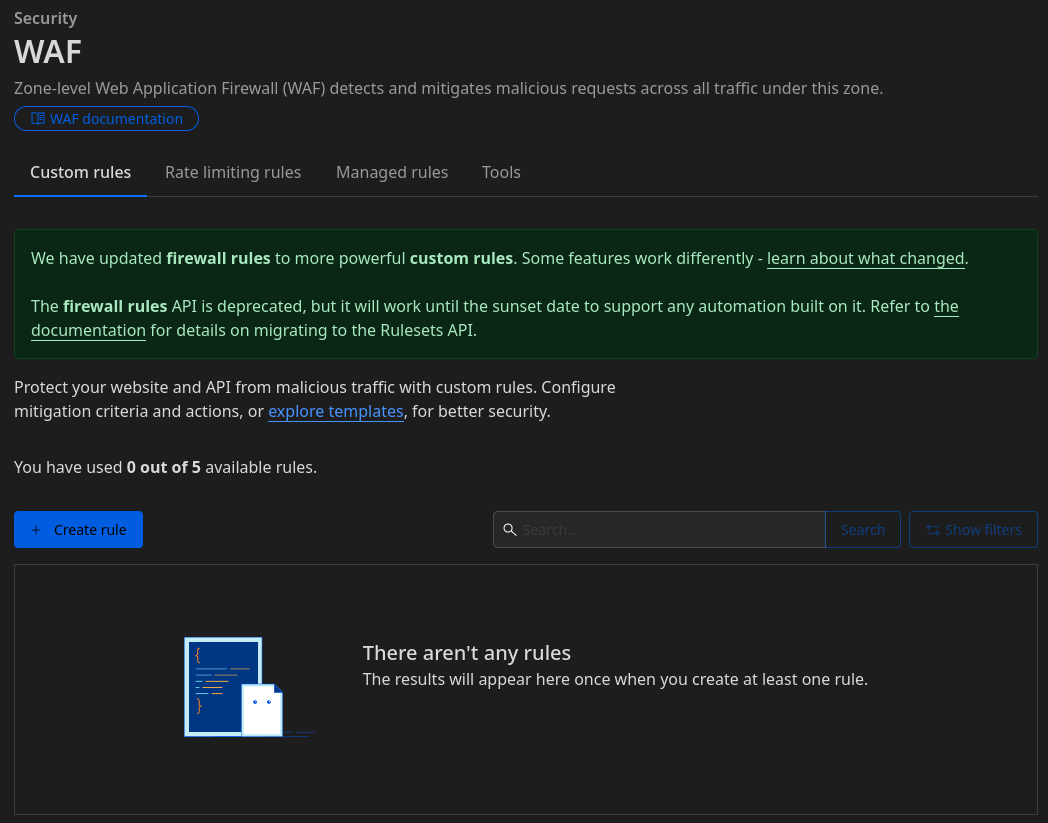
Click on “Create rule”.
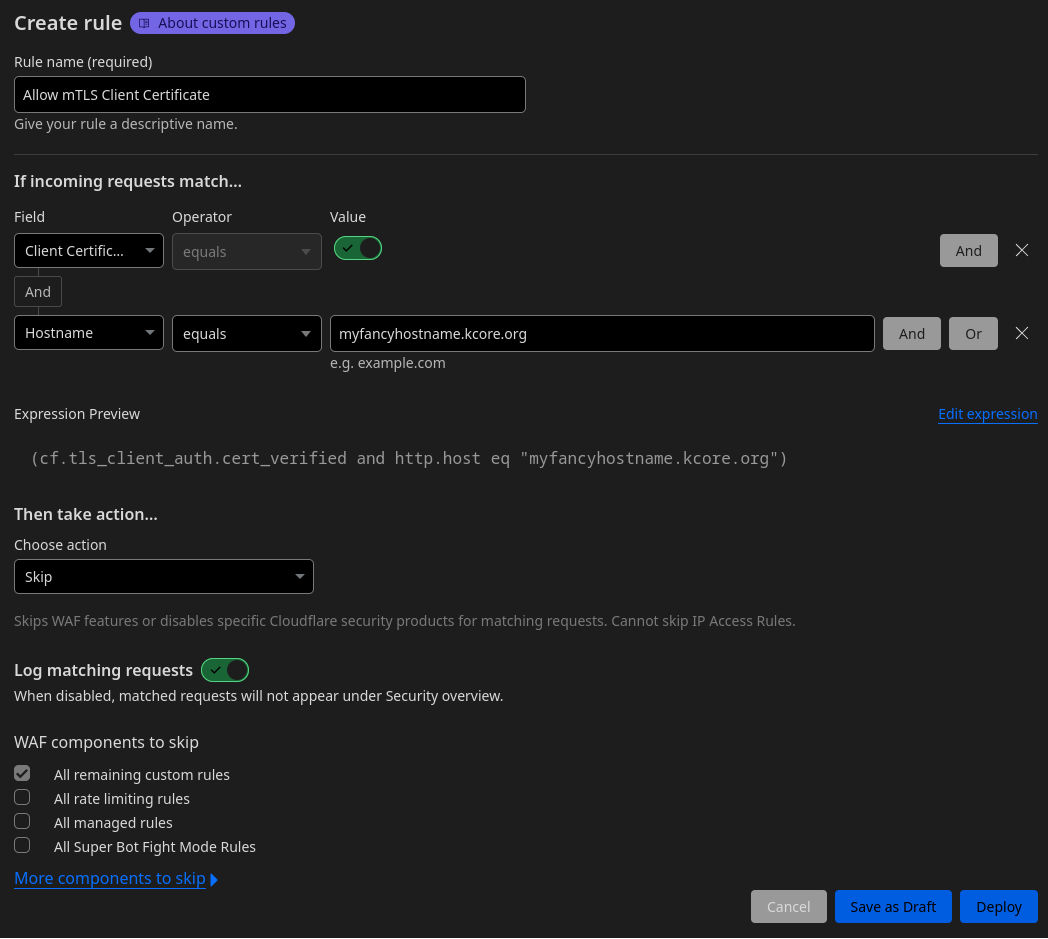
Give the rule a name and under “If incoming requests match…” specify:
- “Client Certificate Verified” equals “yes” (slider set to green)
- “Hostname” equals “
myfancyhostname.kcore.org”
Under “Then take action” specify “Skip” on “All remaining custom rules”.
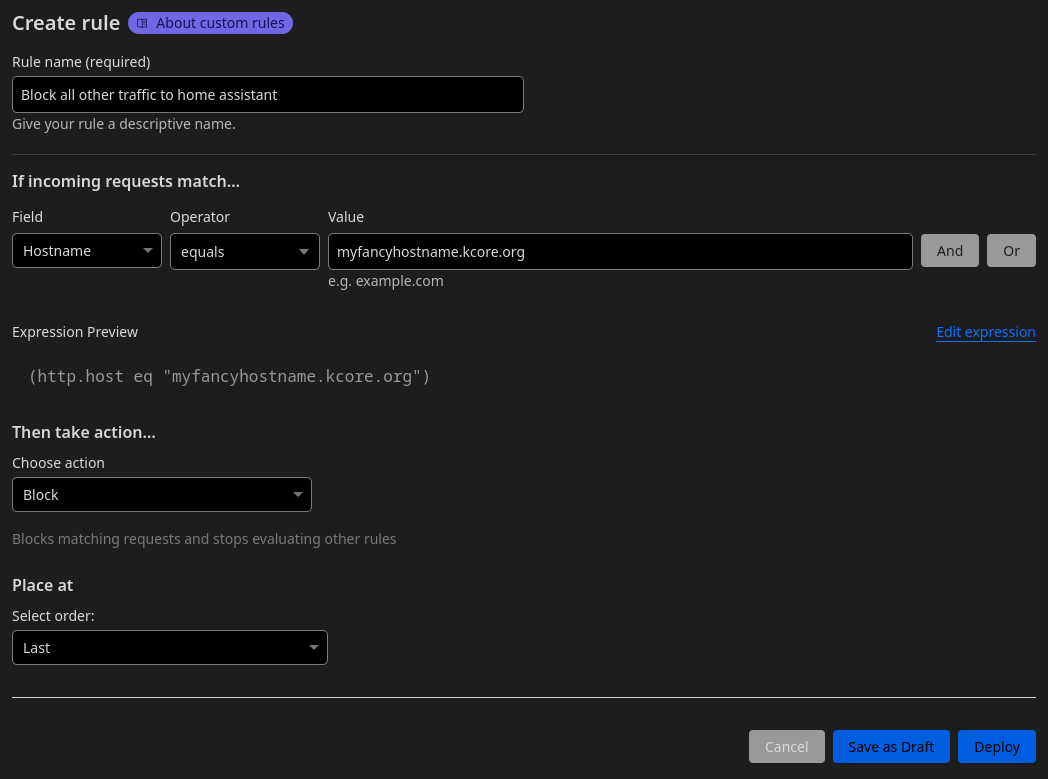
Hit “Deploy”, and “Create rule” to create the second rule to block the traffic.
Once again, give it a name and under “If incoming requests match…” specify:
- “Hostname” equals “
myfancyhostname.kcore.org”
Under “Then take action” specify “Block”. Deploy.
You should end up with two rules like this:
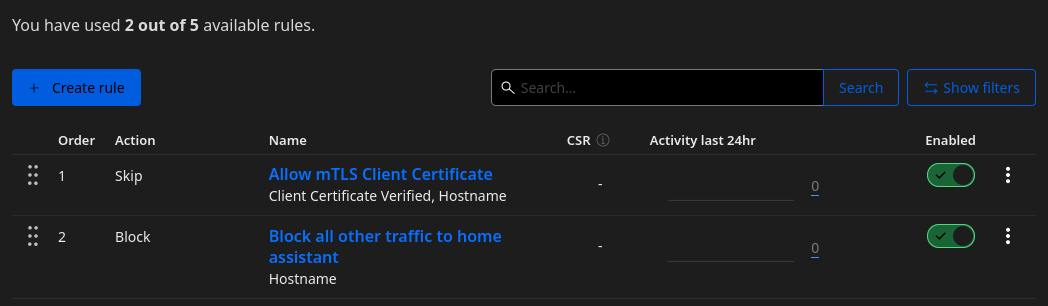
It’s important that the skip rule is before the block rule. If not, edit the rules and change the order.
Now if you browse to the URL you specified for your Home Assistant tunnel, you should be greeted by a lovely block page:
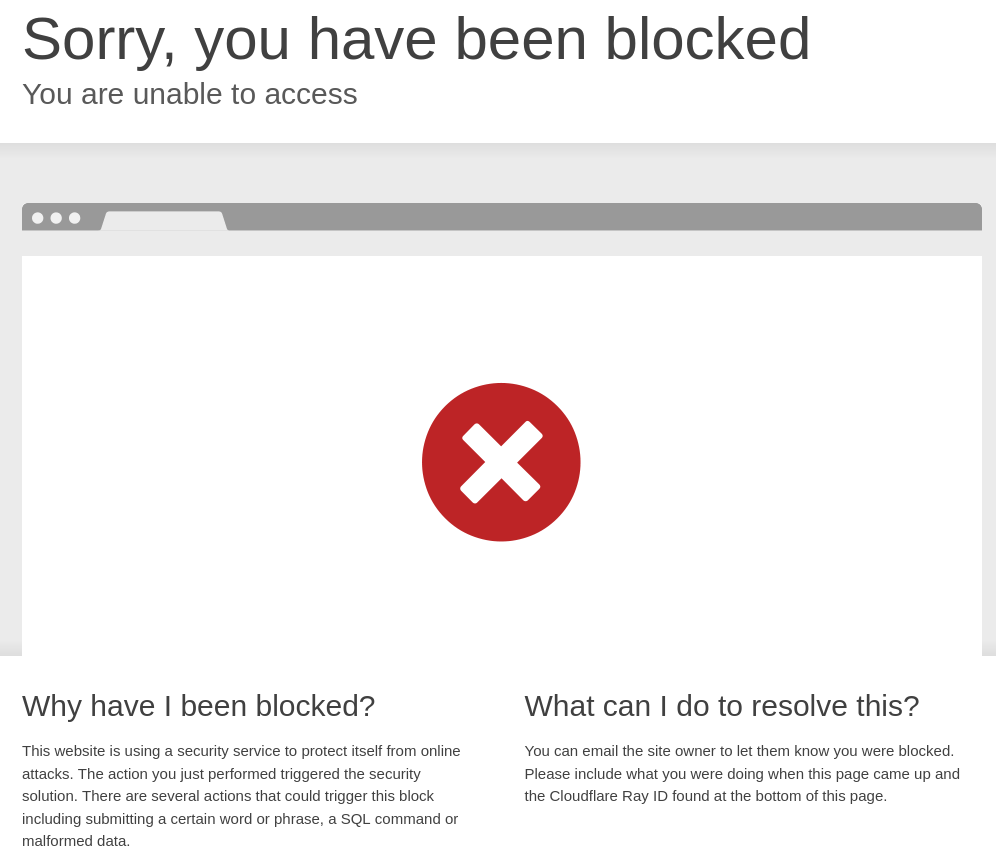
Next up, regaining access!
Adding the client certificate to your clients
To be able to browse to this URL we’ll need to add the client certificate to your clients - be it browsers, tablets, smartphones, …
Browsers
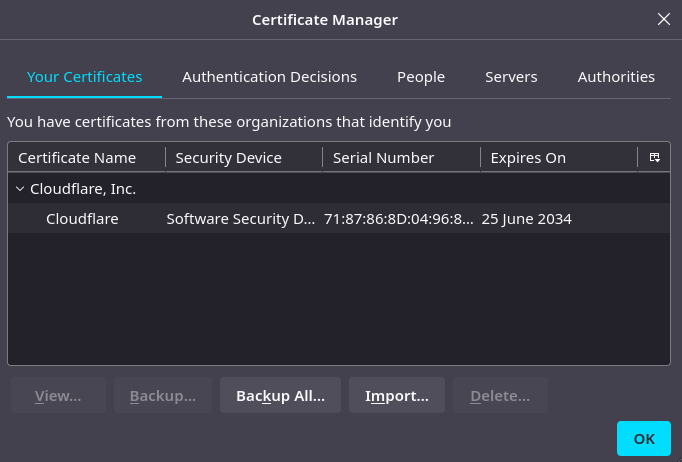
In Firefox, click on the menu on the right and navigate to Settings → Privacy & Security and scroll down to “Certificates”. There click on “View Certificates”. Hit “Import”, specify the you created earlier (mtls_client_cert.pfx), and enter the password. Afterwards you’ll end up with something like this:
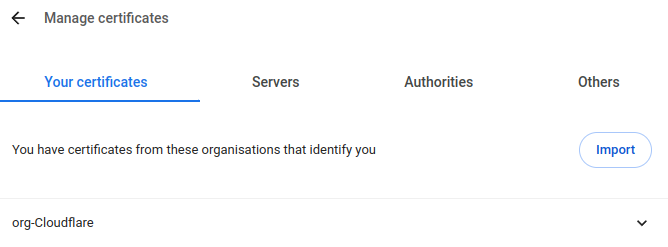
For Chromium (and I think pretty much all Chromium based browsers), open the menu and navigate to Settings → Privacy and security → Security and scroll down to “Manage certificates”. Same story here, hit “Import”, specify the file and password, and it’ll be added.
Once you’ve imported the certificate restart your browser, and if you browse back to the URL, you should be asked for the certificate to use.
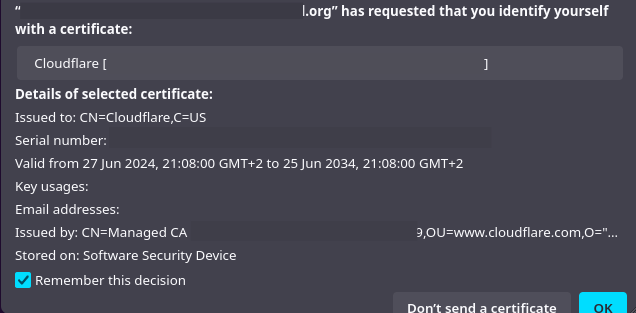
Specify it and you’ll be right in :)
Android
You’ll need to copy the mtls_client_cert.pfx file over to your device in some way. I sent a Signal message to myself :)
It’s rather annoying to show any screenshots since most vendors have their own tweaks to the interface.
In the Android settings search for “User certificates”, which should bring you to a screen that contains the option “Install from device storage”. Once on this screen, specify “VPN and app user certificate”, browse to where you downloaded the file and enter the password.
Configuring the Home Assistant companion app
On your mobile device, open the Home Assistant Companion app, open the menu and navigate to Settings → Companion App and find the “Servers & Devices” section. Tap on your server and under “Connection Information” you’ll need to modify the “Home Assistant URL” to point to your Cloudflare tunnel hostname.
In case you want the app to use a different url when connected to your home WiFi, specify the SSID under “Home Network WiFi SSID” and add the internal URL under “Internal Connection URL”.

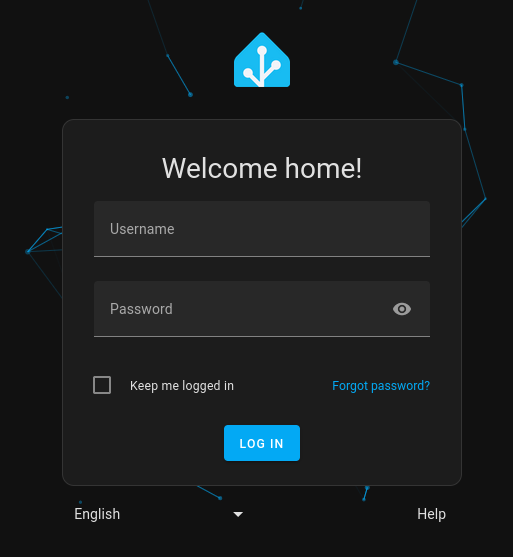
Next time you’ll start Home Assistant when not connected to your home WiFi, you’ll also get a popup asking for a client certificate. Specify it and you’ll be right at home in your Home Assistant!
Leave a comment